Publishing News
The Ojos Project has a News section on our main website that is meant to update people interested in the Ojos Project. This guide will help you figure out how to update the site.
We will be using:
| Tool | Description |
|---|---|
| github.dev | A VS Code-like environment. Easier to use since it authenticates with your GitLab account. |
| Markdown | The markup language used to write posts |
| Mermaid (Optional) | A diagraming tool |
Getting Started
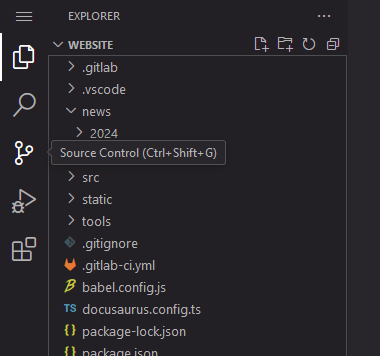
To initiate the GitLab IDE session, you need to go to the repository of
ojosproject.org.
This link will take you directly to the news folder of that repository.
Once you're here, you need to press the . key on your keyboard to open the
GitLab IDE.
In this folder, you will find an authors.yml file and folders representing
years.
authors.yml
The authors.yml file is auto-generated. Please do not change it.
The authors.yml file includes information about members of the Ojos Project.
All of the information that is included is from the information we already
publish of our members.
The important thing to know about this file is that you're identified by your
email. For example, if Carlos wanted to author a news post, he'd set the
authors key as cvaldezh@uci.edu.
Folders and Post Dates
Everything else in the news folder is just folders representing years. This is
not an accident.
The main website uses Docusaurus, and the News section uses the Blog plugin
of Docusaurus. Folders are in years for the purpose of giving them post dates.
If you go inside the folder, you will see that the names of the Markdown files
are in the format of MM-DD-name.md. Docusaurus will use the folder name to get
the post year, and the name of the file to get the post month and day.
So if you want to post something on April 8 and you want to name the file
cool-post.md, you need to name the file 04-08-cool-post.md and place it
inside the 2024 folder.

Docusaurus + Markdown
Front Matter
In the beginning of almost every Markdown file, you will find something like this:
---
authors: cvaldezh@uci.edu
slug: /winter-2024-wrap/
hide_table_of_contents: true
description: >
  The 2024 Winter quarter is almost finished! As we get ready to wrap up for
  Spring break, let's go over some of the accomplishments we had this quarter,
  as well as the plans we have for Spring 2024. Be back soon!
---
The above is an example from the Winter 2024 Wrap Up post we made in March.
| Key | Description |
|---|---|
slug | The content after ojosproject.org/news/. Keep it short and simple. MUST BE INCLUDED. |
hide_table_of_contents | Almost always set to true. |
description | This is just a description of the content you wrote. It's best to write something as search engines like this. |
If you collaborated with someone on an article, you can have more than one author. You can do so by doing:
---
authors:
  - email1
  - email2
---
Truncating
Truncating indicates when the "preview" of an article should stop. Let's take the same Winter 2024 Wrap Up as an example.
# Winter 2024 Wrap Up

The 2024 Winter quarter is almost finished! As we get ready to wrap up for Spring break, let's go over some of the accomplishments we had this quarter, as well as the plans we have for Spring 2024. Be back soon!
<!-- truncate -->
## A look back
### Interviews
...
...
...
If you look at the main news page of the Ojos Project, the Winter 2024 Wrap Up's preview ends at the spot the truncate indicator is.
All you have to do is add the extra <!-- truncate --> line, and then
you can keep writing.
This part is very important. Without the truncate indicator, the full article in the News section will be displayed.
Simple Tables
Markdown lets people make tables! It's a neat feature to use sometimes.
Here's the basic syntax:
| Column 1 Name        | Column 2 Name       |
| -------------------- | ------------------- |
| Content for column 1 | Content for column2 |
This will create:
| Column 1 Name | Column 2 Name |
|---|---|
| Content for column 1 | Content for column2 |
Adding images
Images can be added by using this simple syntax:

Adding an image from your computer may be a bit difficult, and it's best to ask someone in the Developers team for help.
However, if you want to try...
In the website repository, go to /static/images/ and place your image there.
Next, come back to your Markdown file, and use this syntax:

If you're using the Markdown Preview feature, you might not be able to see the image. That's normal. It'll be available on the website. Again, Developers team will have to review and fix any issues, so don't worry too much about this.
Diagrams
Diagrams are made with Mermaid. This can be pretty difficult to create, but it's probably a good idea to bring it up. A great thing about these diagrams, though, is that they're very high quality and adaptive.
Mermaid allows people to create a lot of different diagrams in Markdown. Some diagrams that can be made with Mermaid includes:
Using Mermaid can be tedious as the syntax can be somewhat strict. You can use this Mermaid live editor to view your changes before adding it to the Markdown file.
Finishing Up
Let's say you finally have your post ready to go. Great! But what's next?
Well, you need to commit it to the repository.
Click the + button on all of the files you added, write a commit message, and
then click Commit. Let the Developers team you committed, and you're good to
go!
FAQs
I finished and committed, but I don't see my post
This is normal. Someone on the Developers team needs to review it before it is posted.
I made a mistake. Now what?
Let someone on the Iris team know. They have to review the news posts before they're published anyways, so don't worry!